| View previous topic :: View next topic |
| Author |
Message |
Scoutdad
Commodore

Joined: 09 Oct 2006
Posts: 4754
Location: Middle Tennessee
|
 Posted: Sun Jan 01, 2012 10:47 pm Post subject: TLT Shipyards - D6 to D6M conversion Posted: Sun Jan 01, 2012 10:47 pm Post subject: TLT Shipyards - D6 to D6M conversion |
 |
|
Step one in any big conversion is the initial planning.
I started by comparing the Starline 2400 D6 and D6M miniatures, as well as comparing the SSDs.
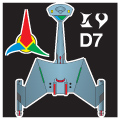
The SSD shows that the D6M was created by removing several of the components present in teh rear hull of the D6 and replacign them with three battery packs. The disruptors in the nacelles were also replaced with smaller battery packs and a Mauler cannon firing port.
The original sculptor of the D6M chose to model these battery packs on the upper surface of the mini. One on each wing and on on top of the deckhouse, as shown in the image below. Cables were then ran from one pack to the next and then to the firing port.
For the Starline 2500, I intend something very similar.
My original thought was to put the batteries below the wings as this would prevent any blockage of the phasers on top of the wings. But if I'm doing this, why not say all the workings are inside the hull and just call the mini a D6M?
Instead, I intend to place the two wing mounted batery packs farther back and lower doen the wing surface. This will still give the D6M the visual distinctiveness it requires, but will not block the L/LR and R/RR firing arcs of the phaser-2s.
The third battey pack will have to be mounted underneath the hull since the Starline 2500 deckhouse has more detail than I care to cover up.
The disruptor bands on both engines will be filed away and holes drilled to accept a length of 1/16" brass tubing for the firing port. My first intention isto use old guitar strings for the power transfer conduits (we'll see how that works out). I will also mold the battery packs from a 2-part epoxy putty (or green stuff).
Here's the image:

The mini is on the workbench awaiting prepping.
So let's be about it!
_________________
Commander, Battlegroup Murfreesboro
Department Head, ACTASF |
|
| Back to top |
|
 |
Jim Lewis
Lieutenant SG
Joined: 25 Mar 2011
Posts: 121
Location: Campbell, CA USA
|
| Posted: Sun Jan 01, 2012 11:22 pm Post subject: |
|
|
Looking forward to following your conversion - it looks really interesting.
_________________
Jim Lewis
GunTruck Studios
 |
|
| Back to top |
|
|
djdood
Commodore

Joined: 01 Feb 2007
Posts: 3414
Location: Seattle, WA
|
| Posted: Sun Jan 01, 2012 11:41 pm Post subject: |
|
|
Looking forward to seeing the mini come together, Tony.
BTW - I've got lots of guitar string stock (good friend is a guitar player and goes through them fast). Lemme know if you need some.
_________________
  |
|
| Back to top |
|
|
Scoutdad
Commodore
Joined: 09 Oct 2006
Posts: 4754
Location: Middle Tennessee
|
| Posted: Sun Jan 01, 2012 11:50 pm Post subject: |
|
|
Oh I got lots.
I'm the only non-musician in Murfreesboro who buys guitar strings on a regular basis.
They make great braided hoses for model cars, planes, tanks, even minis if the mini is big enough and the string fine enough.
_________________
Commander, Battlegroup Murfreesboro
Department Head, ACTASF |
|
| Back to top |
|
|
djdood
Commodore
Joined: 01 Feb 2007
Posts: 3414
Location: Seattle, WA
|
| Posted: Sun Jan 01, 2012 11:58 pm Post subject: |
|
|
I use them for that too. Keeps her from throwing them in the garbage and I used some to doll up the Mk2 Viper kit I built up a present for her hubby.
_________________
|
|
| Back to top |
|
|
Burning Chrome
Lieutenant SG
Joined: 04 Feb 2011
Posts: 118
Location: Michigan
|
| Posted: Mon Jan 02, 2012 4:20 pm Post subject: |
|
|
Looking forward to more, but I'd like to offer the following:
Since the batteries might be relocated, why not change the appearance as well, not just reposition the "blocks".
Maybe they could be "thinner" or "flatter" and take up more space on the "wings" despite what the SSD/SC shows.
I wouldn't relocated the "deckhouse" batteries to the bottom of the hull, as unless its a bit forward from where you are indicating now, as thats were the engine room is and I feel would "ruin" the smooth lines of the D6.
Are you planning on running the "cables" from the batteries as well?
_________________
Suppose you were an idiot. And suppose you were a member of Congress. But then I repeat myself.-- Mark Twain |
|
| Back to top |
|
|
Scoutdad
Commodore
Joined: 09 Oct 2006
Posts: 4754
Location: Middle Tennessee
|
| Posted: Mon Jan 02, 2012 4:31 pm Post subject: |
|
|
I am certainly not wedded to the current size/shape of the battey blocks.
I intend to try several mock-ups from card stock to determine which is more aestetically appealing.
The third (i.e., underneath) battery pack will most certainly be relocated more towards the forward portion of the lower hull, just not so far as to interfere with stand placement.
Yes, the cables will run from battery pack to battery pack to battery pack and then to the nacelle firing ports
_________________
Commander, Battlegroup Murfreesboro
Department Head, ACTASF |
|
| Back to top |
|
|
djdood
Commodore
Joined: 01 Feb 2007
Posts: 3414
Location: Seattle, WA
|
| Posted: Mon Jan 02, 2012 7:40 pm Post subject: |
|
|
| Burning Chrome wrote: | | ....would "ruin" the smooth lines of the D6. |
Bear in mind, maulers are inherently ugly, scabbed-together beasts (the Falcon being a rare exception).
The existing art and minis establish that they typically have the massive externally-mounted battery structures with large conduits running between them and the mauler "barrels". The Romulans (and Klingons) made the D6 ugly as soon as they decided to turn it into a "flying gun", as did the Lyrans with their maulers.
One suggestion I can make for the batteries themselves on Tony's mini would be to use some of that Plastruc or Evergreen embossed styrene plastic sheet. They have lots of patterns (for architecture model use) that when cut up would look spiffy as battery banks, but be much lower profile in thickness than has often been done in the past.
_________________
|
|
| Back to top |
|
|
Scoutdad
Commodore
Joined: 09 Oct 2006
Posts: 4754
Location: Middle Tennessee
|
| Posted: Mon Jan 02, 2012 7:46 pm Post subject: |
|
|
That's not a bad idea.
I have a sheet of the 1/4" grid designed for use as miniature sidewalks. That could work...
_________________
Commander, Battlegroup Murfreesboro
Department Head, ACTASF |
|
| Back to top |
|
|
Scoutdad
Commodore
Joined: 09 Oct 2006
Posts: 4754
Location: Middle Tennessee
|
| Posted: Thu Feb 09, 2012 3:33 am Post subject: |
|
|
Finally began work on this this past weekend.
Step one:
Mini received. Parts laid out to insure that everything was accounted for and that no major defects were present.

Note the flash and the rough areas that will need to be addressed.
_________________
Commander, Battlegroup Murfreesboro
Department Head, ACTASF |
|
| Back to top |
|
|
Scoutdad
Commodore
Joined: 09 Oct 2006
Posts: 4754
Location: Middle Tennessee
|
| Posted: Thu Feb 09, 2012 3:40 am Post subject: |
|
|
Step two:
Clean up and prep work.
The exact order here isn't nearly as important as the tools needed.
To clean this mini I will use the following:
Exacto knife (with standard #11 blade)
A set of modelers files (flat, half round, and triangular see the most use)
Sand paper (various grits ranging from 220 through 600)
A flexi-file (For those who haven't seen / used one) this is a u-shaped metal tube with a narrow strip of emery cloth between the "prongs" Perfect for sanding those hard to reach places)
A collection of emery boards and sanding sticks.
And Sqaudron brand green putty (for filling divots)
After removing the flash and sanding down the "filler port lugs", and polishing up any rough spots - it's time for another looksee.
Just verify that you have not missed anything. It's much easier to clean up the rough spots before assembly.
I got lucky with this one and nothing needed filling at this point.

_________________
Commander, Battlegroup Murfreesboro
Department Head, ACTASF |
|
| Back to top |
|
|
Scoutdad
Commodore
Joined: 09 Oct 2006
Posts: 4754
Location: Middle Tennessee
|
| Posted: Thu Feb 09, 2012 3:46 am Post subject: |
|
|
Step 3: Basic assembly.
Since this is a relatively straight-forward conversion, and since some of the conversion will require connecting parts of the nacellles to the rear hull - I'm going to do the basic assembly next.
Usually, I'm a "two-glue" kind of guy.
That means that I assemble my minis with a combination of both CA adhesive and a two-part epoxy. A drop of CA adhesive in teh center of the joint combined with epoxy on both edges usually does the trick.
The CA adhesie (or super-glue) dries quickly and holds the parts in place while the epoxy slowly cures and provides the joints final strength.
Since this is a resin miniature and the resin is very porous 9compared to white metal), I'm going to simply use superglue and accelerator on this mini. The wings are glued into place (one at a time) and CA accelerator is sprayed to set the glue.

The next step will be filling / sanding of the wing joints to provide a smooth transition with no visible gap between the parts.
_________________
Commander, Battlegroup Murfreesboro
Department Head, ACTASF |
|
| Back to top |
|
|
djdood
Commodore
Joined: 01 Feb 2007
Posts: 3414
Location: Seattle, WA
|
| Posted: Thu Feb 09, 2012 4:12 am Post subject: |
|
|
The more I see it, the more I fall for the new resin D-6.
_________________
|
|
| Back to top |
|
|
Jim Lewis
Lieutenant SG
Joined: 25 Mar 2011
Posts: 121
Location: Campbell, CA USA
|
| Posted: Thu Feb 09, 2012 5:19 pm Post subject: |
|
|
| djdood wrote: | | The more I see it, the more I fall for the new resin D-6. |
Me too! I'm impressed with that one-piece casting of the Bulb/Boom/Engineering Hull. Cleaned up, it looks really good in the raw.
_________________
Jim Lewis
GunTruck Studios
|
|
| Back to top |
|
|
Scoutdad
Commodore
Joined: 09 Oct 2006
Posts: 4754
Location: Middle Tennessee
|
| Posted: Mon Apr 23, 2012 4:45 pm Post subject: |
|
|
Wow! I didn't realize that it has been almost 90 days since the last update.
Unfortunately, I've been side-tracked gettign things together for NashCon 2012 and the big semi-official ACTASF tournament. Between that and the Angry Condor kitbash, the D6M project has gotten pushed to a back burner.
I'm at work now, but will update when I get home.
The D6M has been assembled and primed. And it was also the test bed for the Ninja Magic, magnetic stands from Rattlehead games.
I have narrowed the battery packs to two styles. I will attempt to provide mock-ups of both tonight, along with a photo or two to seee which looks the best.
_________________
Commander, Battlegroup Murfreesboro
Department Head, ACTASF |
|
| Back to top |
|
|
|

